Friday, April 12, 2013

Repurposed Furniture

Repurposed Bedside Table

I've been having all kinds of fun working on the bedroom... repurposing, repainting, clearing out, and sewing ~

I was given a bedside table for free ... It's a good, sturdy piece of furniture... straight out of the 70s ( Best decade EvvvAAA) ! I decided to add a little bright POP to the room and paint it YELLOW~ Yea, dude~~~ YELLOW!

Before
Not too attractive, huh?
What I like about this kind of projects is... U just
can't make it any uglier ~~~ And u don't spend
any $$$ on the original item~

To get this project ready for painting, I needed to sand and prime first:

Sand w/ 220 paper and fine steel wool.
Wipe down w/ a clean cloth.
Use BIN primer from WalMart. I made sure
the furniture was well coated w/ 2 cans of primer.


I then smoothed down the prime coat w/ steel wool after
each coating was good and dry...I put on 3 coats of primer... I
followed all directions on the can.. and even had to wait for
a "warm" day to do this for best results...
Do urself a favor.. and follow all directions on the products !~!~!

I selected Krylon "Bright Idea"... ~!~!
So very sUnnY~~~ I used 2 cans for this project.
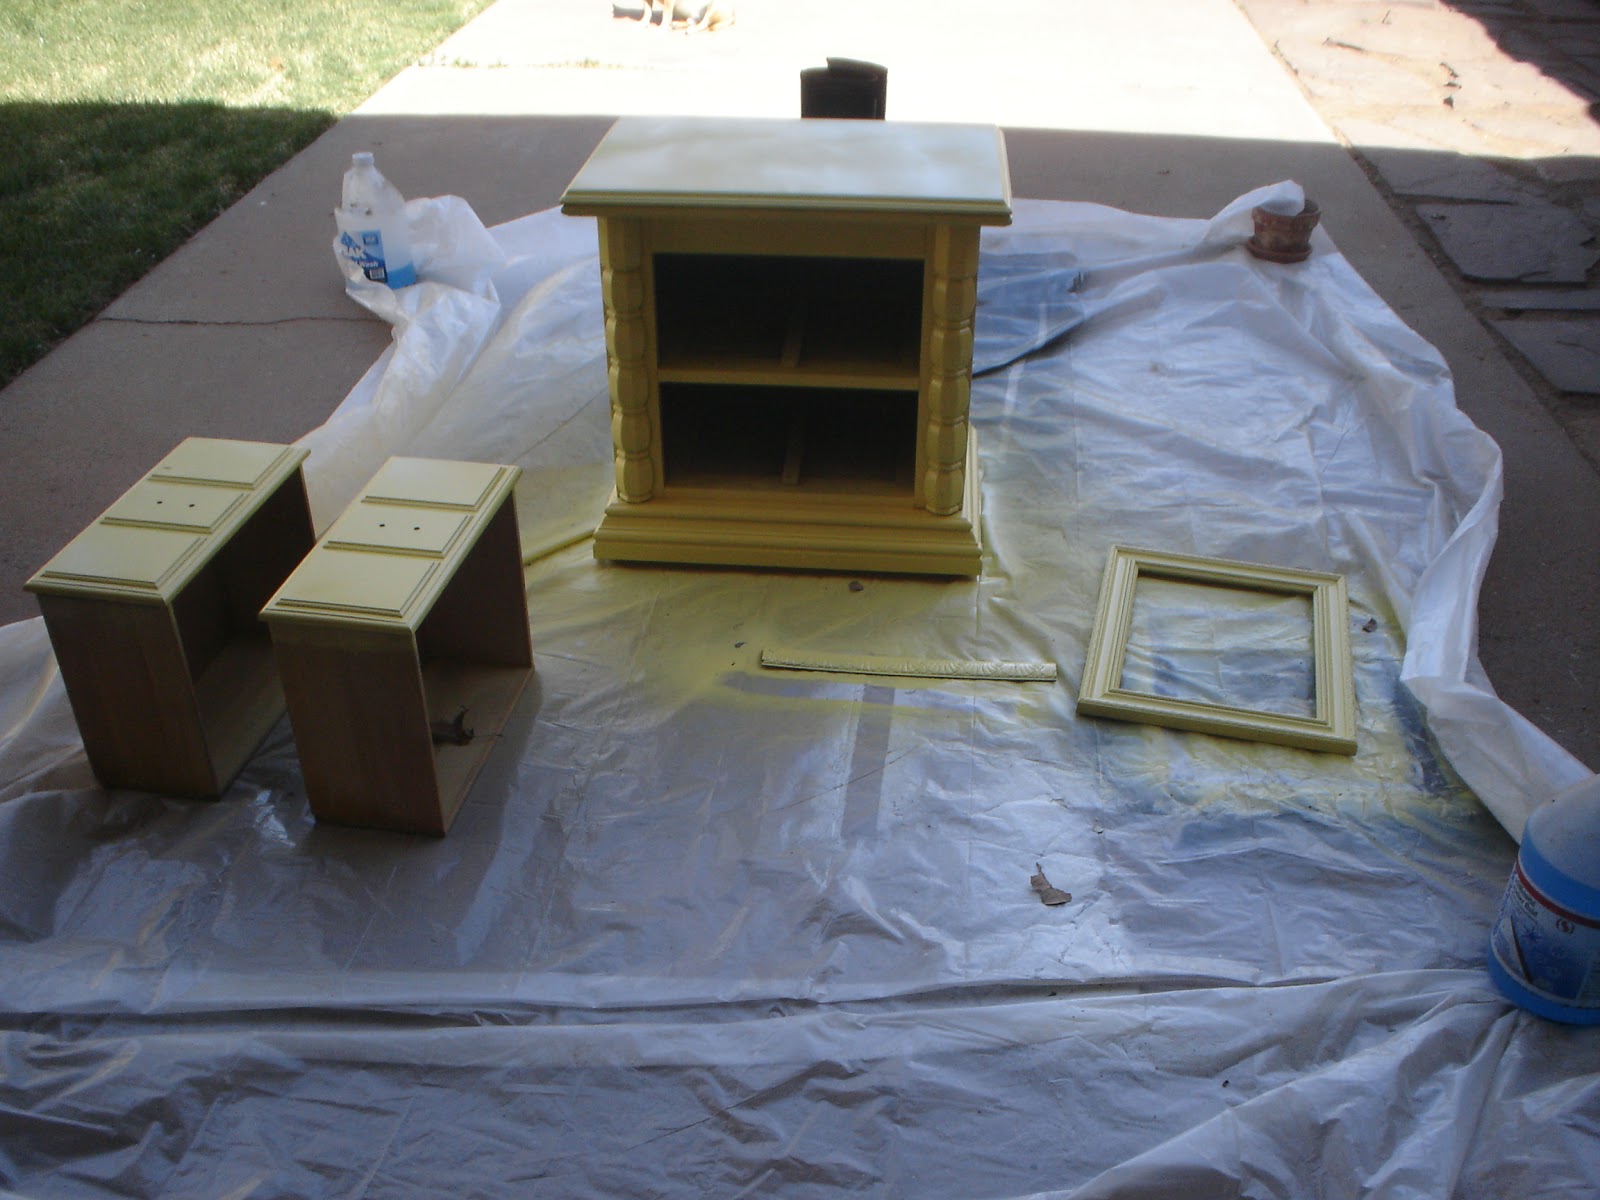
I also repainted a white frame to go in the same
room while I was at it.... ~

Next came the glazing... I had NEVER attempted anything like this...
faux impressions Glaze is from Sherwin Williams
and the matte finish black paint I already had...
I mixed the glaze and paint in a coffee can
1 part glaze to  3 parts paint.
This made a thick, black paint...
I used an OLD, beat up paint brush (don't ruin a good paint brush on this ....) from the garage to put the glaze
over the yellow coat... being sure to work it down into
the nooks and crannies of the furniture~
Then I took a damp cloth and wiped off as much glaze as I wanted
 until I got the "look" that I preferred....
This step I did several times... bc sometimes I wld wipe off more
than I wanted at first... but mainly, I just had FUN with this... My aim
was not to make it perfect ~~~!

I just wanted it original !

Wahhh Lahhh... !!! I was very pleased ~!

Tuesday, April 2, 2013

DIY Lotion

DIY Lotion


I'm sure you've seen this on pinterest and just about everywhere else.. but I have begun making my own lotion and now will NOT use any other kind. It is easy, great for my dry skin, and cheap. It costs about $3 to make and lasts a long time.
This recipe uses 1 bottle of Vitamin E lotion (16 oz), 1 bottle of baby lotion (16 oz), and 1 (7.5 oz) of vaseline all from Dollar General.

Put all ingredients in the blender and set on high for about 4 minutes. Then place it in a Glad container (also from the Dollar Store)

My hubbie was sure this would ruin the blender,
but I assure you, it will NOT.
It lasts quite a while ~~!~!
EnJoY !!

Monday, March 25, 2013

Ukulele ~~ LuLu

Brown~eyed Girl

Now that we've been working so hard, it is time to have some FUN. LuLu was my birthday present this year .... I got her about 3 wks ago. She's an Alulu Acacia tenor uke w/ MOP (mother of pearl) inlays of 3 koi fish. She's gorgeous and has a precious sound. ~!~!

Finally did a vid w/ her... Hope u enjoy. Be sure and sing along... or it's not any fun.
~~ Peace ~~~
And Uke ON !

Thursday, March 21, 2013

YeLLoW & BlaCk AccEssoRies

YeLLoW & BlaCk AccEssoRies
for BedrOom < tHan  $ 10 DoLLaRs

As u know, I am also working on one of the bedrooms... I am "hooked"
on yellow, black, and grey ~!~!
Now I see it everywhere ~
I bought 3 yards of material and made a mural.. &&& got inspired
to do something more w/ the material left over....
The burgundy pillows in this room had to GO GO GO...
and so did the quilt on top of the bed.
I took the pillows apart and remade them into some fresh new ones ~~
UUUUU yummy !!!

3 pillows
small rag quilt (for color)
and a covered basket
The buttons were from my aunt's button bucket...
I just hot-glued them on ~~!~!~~~
These pillows used to be Burgundy. I took the
stuffing out of the inside and made "new"
pillows. I didn't want to store the old
ones....
These rag quilt pieces I've had for almost a year
from an earlier project  ~!~!

Rag Quilts are a great way to use scraps.
The back of this is black denim / an old
duster jacket that no one was wearing and
came to me FREE... 

Hippies Luv Free Stuff ~!~!~
I painted and re~purposed a brown basket to hammered black
with Krylon spray paint,
covered the inside with grey scrap material,
 and wrapped w/ white netting (that was given to me free) for a
"softer" look... This is to hold my favorite books !~!~!
While out TrEaSurE hUntInG I found some
items to go on the dresser...
a square black Plate and glass, black vase from Good-Will
 total of $ 3 Dollars
(Mondays are 25% off days)
&&&
a Big Yellow/ orange Flower from
Dollar General
$2 Dollars

So these treasure~hunting items were
< $$$ 5 Dollars (total)  ~!~

Happy DIY~ing


Tuesday, March 19, 2013

Strip Quilt Mural ~ Easy

Strip Quilt Mural
Repurposing what's on Your wall
w/o Spending Much $$$
$10 Project

I had a pic that I have had for a long time that was rather large.
It hangs in the spare bedroom. The spare bedroom is a conglomerate
of mismatched furniture... an island of misfit toys. One piece from
the 1950s, which was given to me... another piece from the 1970s... also
given to me. (another outcast), and the bedframe purchased by
my hubby during his 'single' years... which is rather quite stylish
and from overstock.com. The poor saggy lamp was a resale shop pickup and
is very generic.... which is rather 'safe' in our house....
The whole room just needed some freshness... something to pull it all together... to
make it at least appear that it was purposed to be together and not just
cast aside .... :(
So... I got busy w/ a color scheme in my head... and with a lot of snooping
around on pinterest, DIY blogs, and how to sites....

I started first with the big out of date picture... A big HONKING thang... it
was just not my style and it was another 'freebie' that someone cast off on me...


 I didn't want to get rid of it or store it... so ... I decided to repurpose it.
O.. so much fun %%%
Yellow ~ Black ~ and Grey... I've been seeing these
fresh, popping, happy colors a LOT of places...
or maybe it was just the bumble bees flying around the yard....
but I just HAD TO HAVE those colors somewhere in the house~
I didn't feel brave enough to bring it into the "master"... but
what could hubby say about the guest room? NOTHIN~~~
 
AFTER


BEFORE
(sorry about the glare ~ )

I took the measurements of the frame: 27 " x 37"
and took the glass and picture out of the frame.
This is MUCH bigger than the pics show ~~


I repainted the frame Krylon / Hammered Black
(also used in the hallway)
which does look line a dark grey.
U LiKeY ? ? ?
I cut out of an old sheet the size of the frame and marked the center of the sheet.

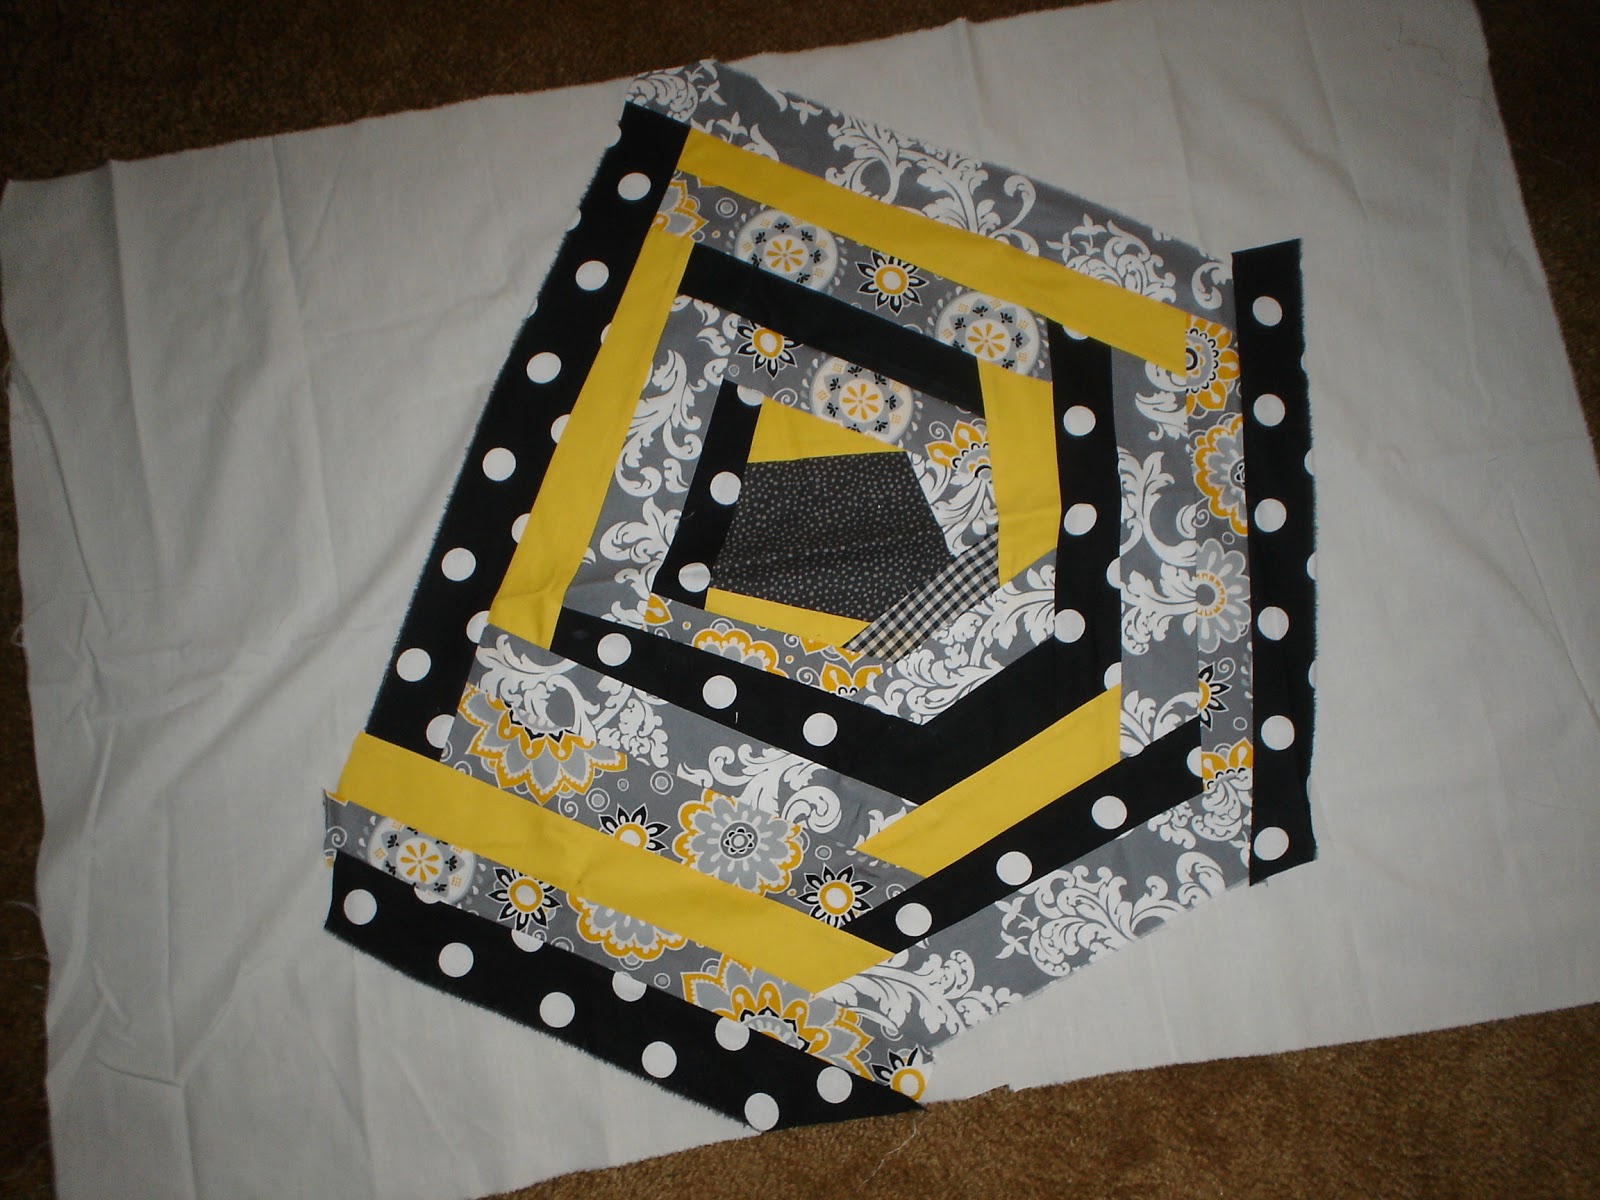
I made a center patch w/ 5 sides and pinned it in the middle.
I then began using the "Strip Quilt" technique.
Instead of making many small ones (8x8)...
 I decided to make one BIG ONE  ! ! !

 I saw this material other
day @ Hobby Lobbyand couldn't help myself.

I got a yard of each pattern... which
was WAY too much, but gave me left overs for another project 
 ~!~! (Uhhhh.. what can I do NEXT???)
Aren't the colors GoRgeOUs ??? So yellow~ yummy !~!~!
I also added some scraps from other projects...

Making a strip quilt is easy. It just takes time.
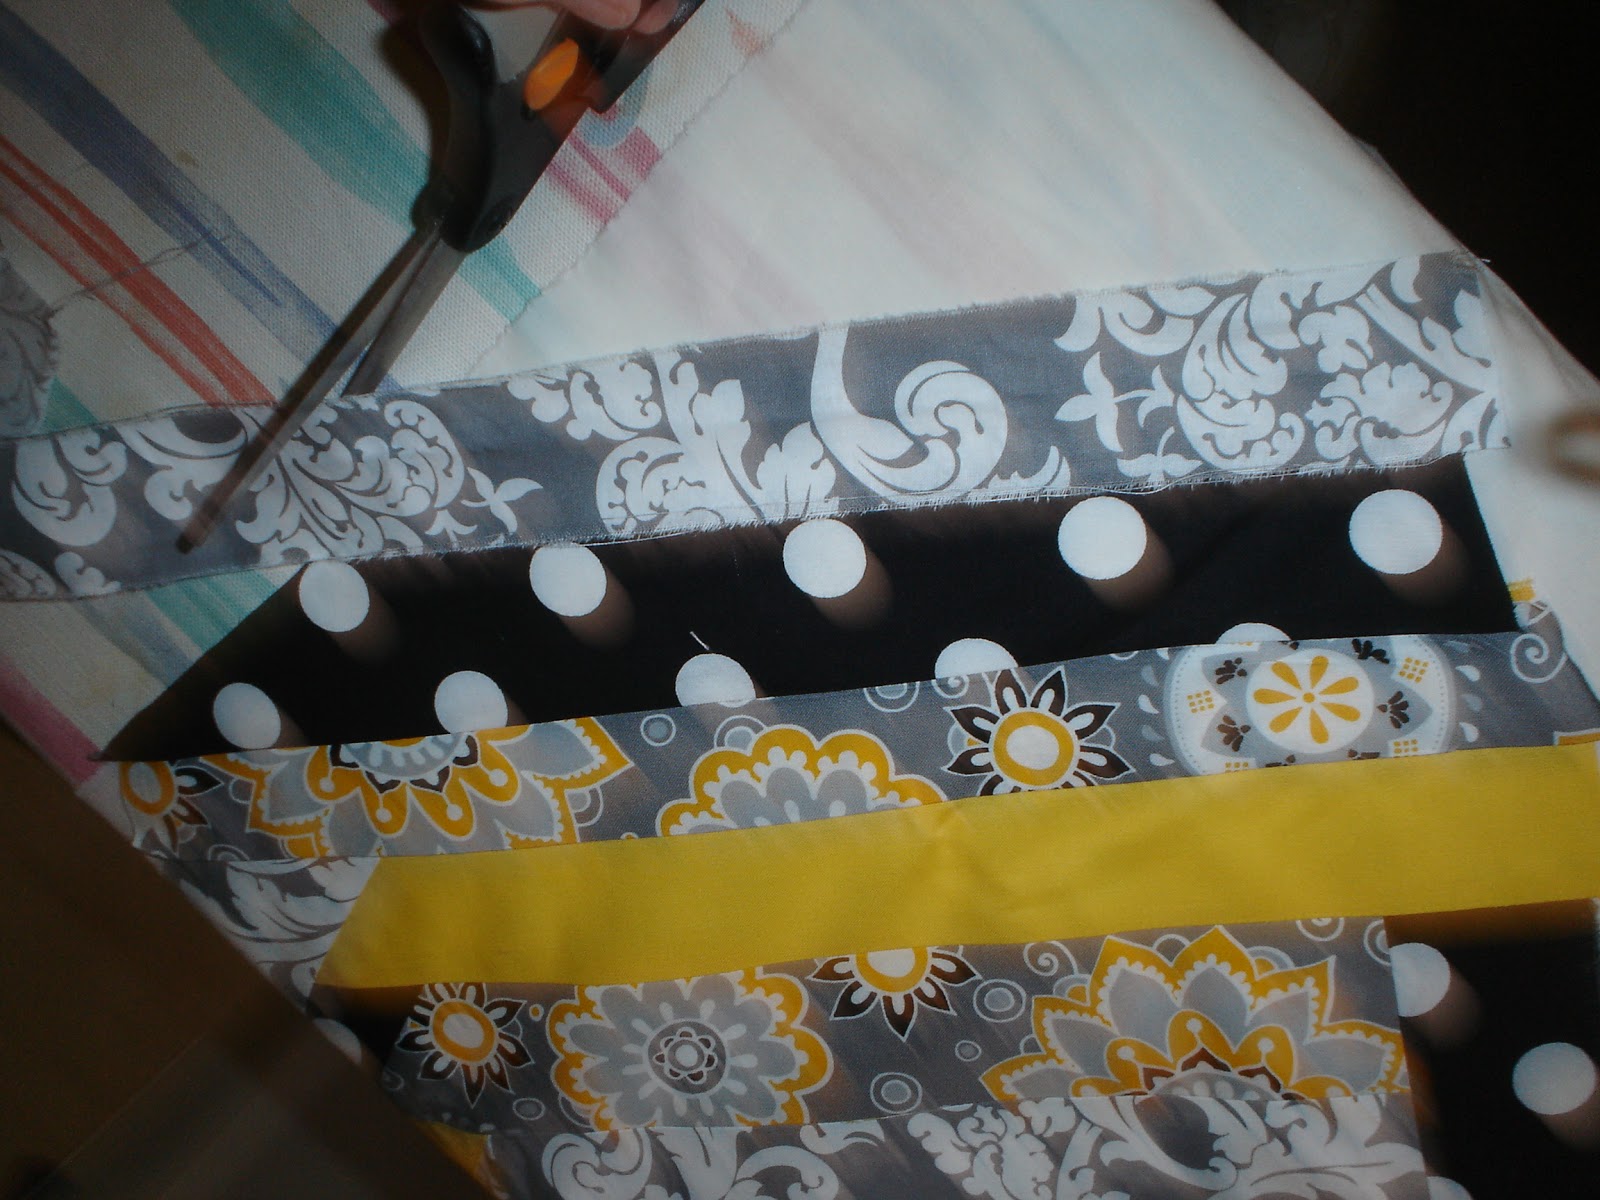
Cut strips about 2 inches wide and rather long if making
as big project like this one.
***
Really, I recommend doing small projects first... b4 starting
one this big.... U could make coasters (Another idea pop pop popping #*#*)

Sew the strips on one at a time, being sure to cover the raw edges of the piece sewn on before. Eventually it will work outward from the 5 sided center piece.

I have found it best to iron each strip BEFORE and AFTER sewing it on.

Lining up a strip before sewing it on....

Sewing on the next strip....

Now iron it down flat...
Keep adding and trimming...
(GOSH.. my hands look old.. I guess that's bc they ARE * LOL)

It all came together nicely for less than $10 ~!~!~
And hangs beautifully on the guest bedroom wall
just in time for SPRING ! Woop Woop.

AFTER
(I put my hand up there so u cld get an idea of the SIZE of this piece)

There are many youtube vids on how to make strip quilt pieces...
I watched quit a few before attempting to make strip quilt pieces.
But BEWARE ~!~!
U have been forewarned !!!
Once u get started it's VERY addictive...
U can NOT stop !!!
* * * * *
Happy DIYing


Tuesday, March 12, 2013

FraMed Dry~EraSe NoTepAd

FraMed   ( dRy~EraSe )   NoTEpaD


My hubby and I leave little "notes" of luv and appreciation
to each other all the time. I have stacks of note pad papers
with sweet little notes from him.... but I decided to try
something funky and fun.... A dry~erase notepad ~!~!
This is so simple. I made it all out of scraps I had around the house.
All I had to buy were the dry~erase markers for $1.
I already had the black frame from the Dollar Store.

Take a frame that u are not using. Trim material, special paper, or something u like to fit into frame. In this case I used scrap~book paper that I will never use up.
Make a cute flower out of matching material.
In this project I used some tow~sack material that had been given to me.
 Cut a strip about an inch thick and 12" long.
Cut out a circle of felt.

Begin glueing the material onto the felt, making pleats as you go.
The only hard part about this is not burning your fingers! (which I do every time)

Then use a decorative piece of jewelry, buttons, or something you
have in your craft box as the center of the flower.
I used 2 buttons...
Glue onto side of frame!

Now u can leave notes to those u love around the house w/o having
to look for paper ~!~!
Cute ~ Cute ~ Cute !
Easy ~ Easy ~ Easy !
Now, leaving little "heart" notes to
hubby is much more fun ~!!!

Friday, March 8, 2013

Using Material for Splashes of Color

Office Make~Over Continues.....


The office just didn't seem to have any color scheme... So I decided to make one. After painting
a few things turquoise with Krylon paint, I decided to play ....

I am not super great at painting... but I wanted some splashes of color thru~out the backdrop of the shelves... So I took my little self down to Hobby Lobby w/ a Christmas giftcard and purchased some "fun fabric"... This wld have been WAY out of my "sanity zone" to try to paint! I cut out a  few blocks, got out the hot glue gun, and glued away!

 I think it turned out pretty fab.

Even hubby liked it ~!~! ( and he doesn't likey likey much bc he isn't artsy fartsy...)Material can work better than paint sometimes for accents, small areas, etc.
Give it a try ~!~!
Rotary scissors, fab material, measuring tape, cutting board, and glue gun !~!~
Nuthin fancy here ~


Hot glue edges...


In case you don't remember... here's the B4...

Wahhh Lahhhh ~!~!
(I think I will add some more later on...)
This project took about $5 to create!

More to come w/ the office make~over ~!~!