Showing posts with label repurposing. Show all posts

Monday, June 3, 2013

Aprons Out of Men's Shirts

Apron Made Out of a Man's Shirt
Repurposed Men's Shirts

This project is easy and fun. I like easy and fun... it's a great combo! My father passed more than two years ago and Mom gave me some of his dress shirts. A friend passed on a simple idea of making an apron out of a man's shirt. Dad wore a 2x tall-man and I knew this would be ideal... bc I need a large apron to cover up all the messes I make while cooking! I'm one sloppy cook! I knew this would be a great way to preserve memories and times of happiness w/ my dad bc this was his favorite shirt. We saw him wear it many times through the years.


Very cute and simple apron~!~!

How To...

Cut off the sleeves, and the back of the shirt. Be sure to leave about
and inch or more next to the seam because this will be tucked and sewn down
on top of the side seam that is already there.

From the collar, shoulder seam, measure 2 inches and mark with a pencil or
marking pen.

Measure from the mark to the bottom of the arm pit and draw
a straight line. Cut on that line.

You will need to iron (hippies always use irons and pins when they sew)
the seam making a "french hem" (sometimes called a shirt tale hem). Iron and then pin
into place as you go. Do this all around the apron: up both sides and to the collar and around the collar.

This hippie is the Queen of Zig-Zag. Begin zig-zagging close to one side of the
hem and then make another zig-zag stitch right next to it. This will ensure
that the hem is held into place and will not come unraveled during the wash.
I also like the "look" of this finish. I resembles a surger... I
don't have one .... so this comes close to making that stitch (in my
novice opinion).

For the ties, Cut out two long strips from the remnants. Make them 2 inches
wide. Press a center fold and then fold both edges inward.... keeping the folded edges
on the outside....Press and pin.


Zig-Zag stitch, tie knots in the ends and sew onto the apron...


Easy ~!~! Fun ~!~! And a wonderful memory of my Dad ~!~!

More men's shirts w/ potholders to match...

Friday, April 12, 2013

Repurposed Furniture

Repurposed Bedside Table

I've been having all kinds of fun working on the bedroom... repurposing, repainting, clearing out, and sewing ~

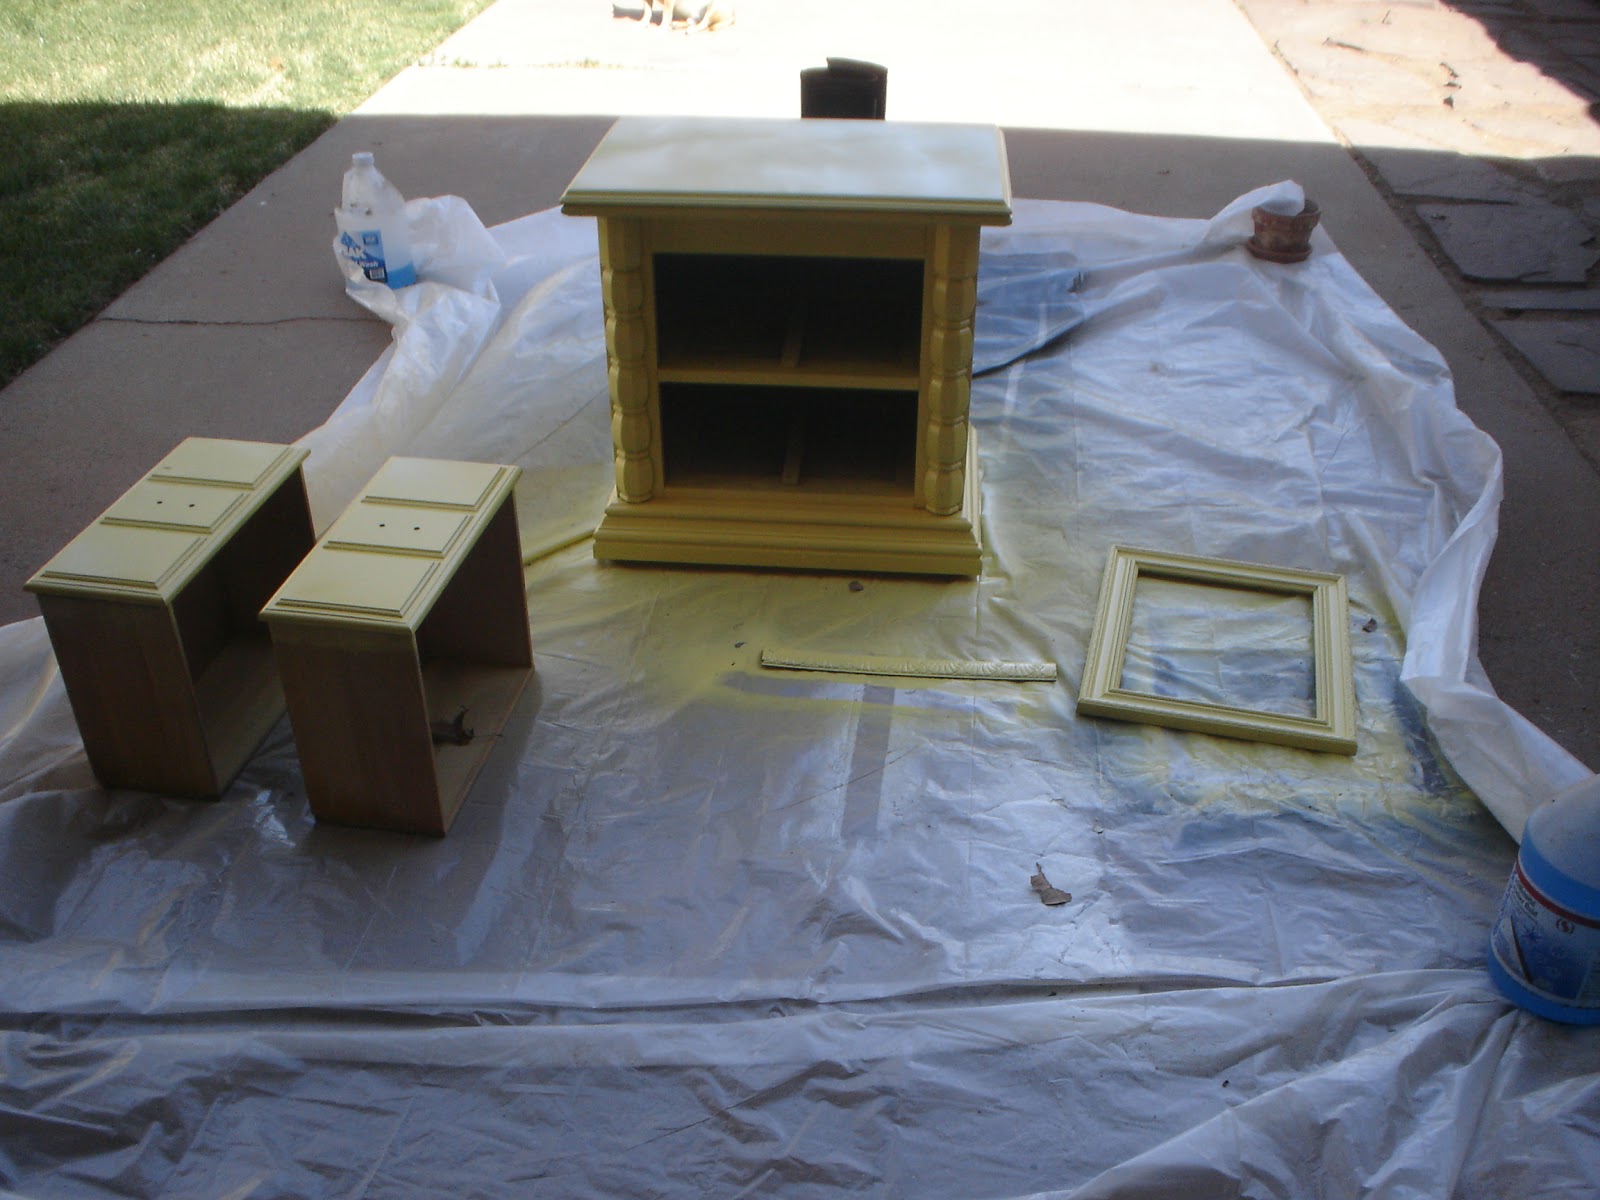
I was given a bedside table for free ... It's a good, sturdy piece of furniture... straight out of the 70s ( Best decade EvvvAAA) ! I decided to add a little bright POP to the room and paint it YELLOW~ Yea, dude~~~ YELLOW!

Before
Not too attractive, huh?
What I like about this kind of projects is... U just
can't make it any uglier ~~~ And u don't spend
any $$$ on the original item~

To get this project ready for painting, I needed to sand and prime first:

Sand w/ 220 paper and fine steel wool.
Wipe down w/ a clean cloth.
Use BIN primer from WalMart. I made sure
the furniture was well coated w/ 2 cans of primer.


I then smoothed down the prime coat w/ steel wool after
each coating was good and dry...I put on 3 coats of primer... I
followed all directions on the can.. and even had to wait for
a "warm" day to do this for best results...
Do urself a favor.. and follow all directions on the products !~!~!

I selected Krylon "Bright Idea"... ~!~!
So very sUnnY~~~ I used 2 cans for this project.

I also repainted a white frame to go in the same
room while I was at it.... ~

Next came the glazing... I had NEVER attempted anything like this...
faux impressions Glaze is from Sherwin Williams
and the matte finish black paint I already had...
I mixed the glaze and paint in a coffee can
1 part glaze to  3 parts paint.
This made a thick, black paint...
I used an OLD, beat up paint brush (don't ruin a good paint brush on this ....) from the garage to put the glaze
over the yellow coat... being sure to work it down into
the nooks and crannies of the furniture~
Then I took a damp cloth and wiped off as much glaze as I wanted
 until I got the "look" that I preferred....
This step I did several times... bc sometimes I wld wipe off more
than I wanted at first... but mainly, I just had FUN with this... My aim
was not to make it perfect ~~~!

I just wanted it original !

Wahhh Lahhh... !!! I was very pleased ~!

Tuesday, March 19, 2013

Strip Quilt Mural ~ Easy

Strip Quilt Mural
Repurposing what's on Your wall
w/o Spending Much $$$
$10 Project

I had a pic that I have had for a long time that was rather large.
It hangs in the spare bedroom. The spare bedroom is a conglomerate
of mismatched furniture... an island of misfit toys. One piece from
the 1950s, which was given to me... another piece from the 1970s... also
given to me. (another outcast), and the bedframe purchased by
my hubby during his 'single' years... which is rather quite stylish
and from overstock.com. The poor saggy lamp was a resale shop pickup and
is very generic.... which is rather 'safe' in our house....
The whole room just needed some freshness... something to pull it all together... to
make it at least appear that it was purposed to be together and not just
cast aside .... :(
So... I got busy w/ a color scheme in my head... and with a lot of snooping
around on pinterest, DIY blogs, and how to sites....

I started first with the big out of date picture... A big HONKING thang... it
was just not my style and it was another 'freebie' that someone cast off on me...


 I didn't want to get rid of it or store it... so ... I decided to repurpose it.
O.. so much fun %%%
Yellow ~ Black ~ and Grey... I've been seeing these
fresh, popping, happy colors a LOT of places...
or maybe it was just the bumble bees flying around the yard....
but I just HAD TO HAVE those colors somewhere in the house~
I didn't feel brave enough to bring it into the "master"... but
what could hubby say about the guest room? NOTHIN~~~
 
AFTER


BEFORE
(sorry about the glare ~ )

I took the measurements of the frame: 27 " x 37"
and took the glass and picture out of the frame.
This is MUCH bigger than the pics show ~~


I repainted the frame Krylon / Hammered Black
(also used in the hallway)
which does look line a dark grey.
U LiKeY ? ? ?
I cut out of an old sheet the size of the frame and marked the center of the sheet.

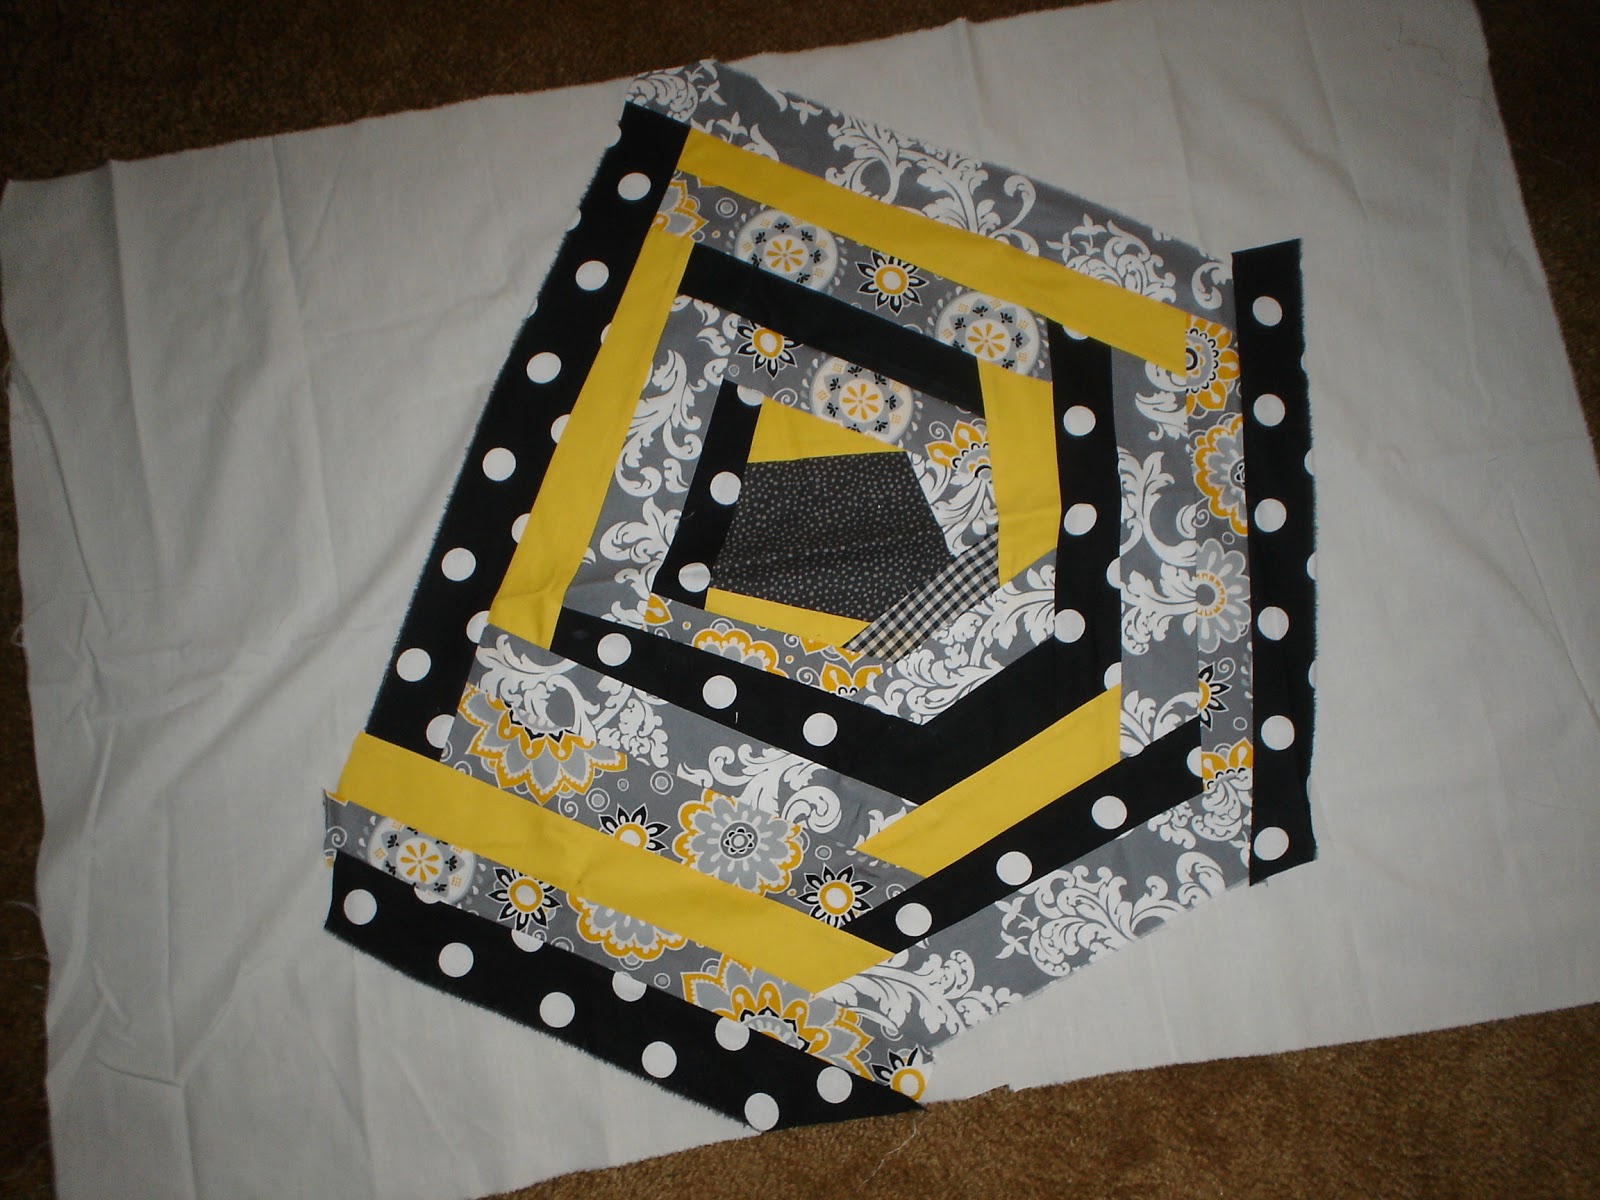
I made a center patch w/ 5 sides and pinned it in the middle.
I then began using the "Strip Quilt" technique.
Instead of making many small ones (8x8)...
 I decided to make one BIG ONE  ! ! !

 I saw this material other
day @ Hobby Lobbyand couldn't help myself.

I got a yard of each pattern... which
was WAY too much, but gave me left overs for another project 
 ~!~! (Uhhhh.. what can I do NEXT???)
Aren't the colors GoRgeOUs ??? So yellow~ yummy !~!~!
I also added some scraps from other projects...

Making a strip quilt is easy. It just takes time.
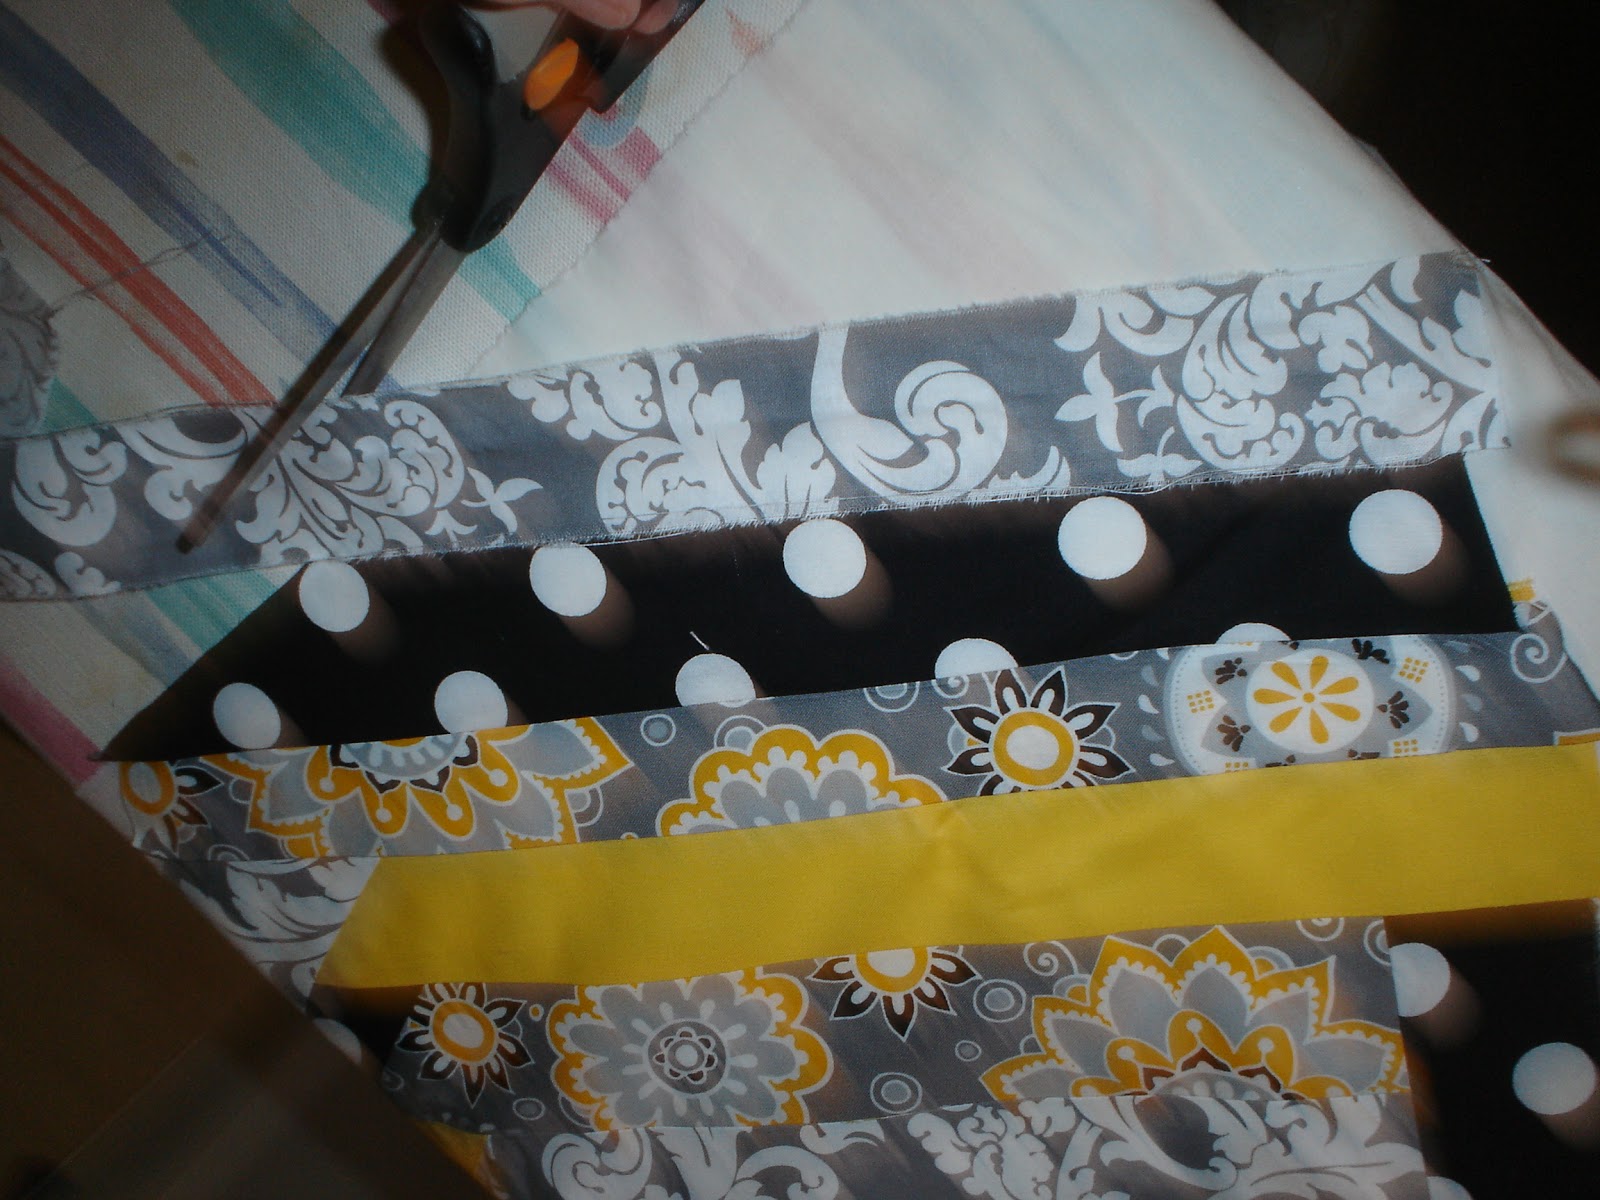
Cut strips about 2 inches wide and rather long if making
as big project like this one.
***
Really, I recommend doing small projects first... b4 starting
one this big.... U could make coasters (Another idea pop pop popping #*#*)

Sew the strips on one at a time, being sure to cover the raw edges of the piece sewn on before. Eventually it will work outward from the 5 sided center piece.

I have found it best to iron each strip BEFORE and AFTER sewing it on.

Lining up a strip before sewing it on....

Sewing on the next strip....

Now iron it down flat...
Keep adding and trimming...
(GOSH.. my hands look old.. I guess that's bc they ARE * LOL)

It all came together nicely for less than $10 ~!~!~
And hangs beautifully on the guest bedroom wall
just in time for SPRING ! Woop Woop.

AFTER
(I put my hand up there so u cld get an idea of the SIZE of this piece)

There are many youtube vids on how to make strip quilt pieces...
I watched quit a few before attempting to make strip quilt pieces.
But BEWARE ~!~!
U have been forewarned !!!
Once u get started it's VERY addictive...
U can NOT stop !!!
* * * * *
Happy DIYing


Wednesday, March 6, 2013

OffiCe MaKe~oVer

oFFiCe MakE~oVeR
w/ PoPs of bLue
(organizing and decluttering b4 projects)

We have to admit that no major project can be started until the "area" has been
organized and decluttered. This is NOT a "fun" task, but the emotions
afterwards are very rewarding !

Our office is a total disaster ! @ ! It's as if we are slowly but surely being taken captive by our clutter w/o even being aware of it # ~ # Today I took time to dust and refresh our office shelves. This task had not been attempted in YEARS. (The pics will prove this ~%~  ) If you know me personally, you know WHY I have not attempted this in 3+ years !!! Didn't do much to the rest of the office. That will have to come later. B4 thinking about "decorating" up a room, I have to do the
'not so fun' dirty work.
I spent less than $5 with this little project today. A can of paint ~!~

Valspar Gloss / Tropical Oasis
(the same color I used in the hallway wall decor)

I'm almost embarrassed to put up the B4 pic ~*~*~
but here goes Nuthin...
 Before                                                              After
Just a conglomeration of collected "stuff, junk, and more stuff"....
{ { {Plz don't call "Hoarders" !} } }

Before decluttering

 After decluttered

Even Paco was horrified  ! & !
Before starting to clean and organize I had to
 promise hubby (cross my heart & hope to die ~ stick
a thousand needles in my eye )
that I would NOT throw anything of
HIS away. Even if the date on it is 1955. Yes...
I have found newspapers that OLD in this house.

 It terrifies him when I get into this mode!
After hours of pulling everything off the shelves, cleaning thoroughly,
and using a dab of turquoise paint on a few doo~dads,
it looked MUCH better.


Personally, I still think this looks quite cluttered, but it does look better.
Many of the "things" on the shelves have sentimental value.

I hope that u can see the "pops" of blue here and there.
It does help "tie" it all together.
And I'm planning on adding a "surprise" piece later... so
keep in touch !

Very little was thrown away. I put up the big white panels on the bottom and
behind them are things eliminated from the shelves.
A lot of dust was removed!

Pops of BLUE
used thru~out the shelves !~!

Happy de~cluttering, organizing, and dusting !~!